|
CSY |
|

|
Home Page |
||
|
CSY Workshop Home |
||
|
Soggy Paws CSY Home |
||
|
New Cat Workshop Pages |
||
|
Engine |
||
|
Electrical Systems |
||
|
Plumbing
Systems |
||
|
Refrigeration |
||
|
Rig
& Sails |
||
|
Hull |
||
|
Cockpit |
||
|
Deck |
||
|
Interior |
||
|
Steering |
||
|
Electronics |
||
|
Computers |
||
|
Workshop Links |
||
|
Miscellaneous |
||
|
About Us |
||
|
Contact Us |
||
|
About CSY Boats |
||
|
See more 'boat project' discussions by Dave on the CSY Owners Forum |
REFRIGERATION
| 12 Volt Refrigeration | Holding Plates | Refrigeration System Options |
|
Upgrading Old Refrigeration Insulation |
Removing the Front Facing of a CSY WT Refer Box |
Laser Temperature Gun |
Last Updated: 05/14/2023
Note: We upgraded to a Frigoboat Danfoss/Evaporator Plate
refrigeration system in January 2011, eliminating the holding plates and a
lot of noise and aggravation. We now believe this is the best option
for marine refrigeration.
Installation notes for our Frigoboat
12 Volt Refrigeration (2008 version)
Despite what some salesmen may lead you to believe, designing an efficient refrigeration system on a boat is a most complicated endeavor involving myriad decisions and a significant amount of research in order to get it right the first time around. calder
Most refrigeration experts agree that a quality high capacity 12 volt holding plate refrigeration system with well insulated boxes is the most convenient, reliable and efficient system for long term cruising with a big refrigerator and freezer. Installing a system yourself for a reasonable amount of money that will cool large boxes for many years and that you can repair yourself is an entirely different thing from having a mechanic install an off the shelf system that is guaranteed for a year or two. The system described below is the former design.
My system has been
on the boat now for 12 years using the same major components.
The compressor, a Tecumseh HG 1000 is now 30 years old and still going
strong with only new seals and gaskets. In comparison Danfoss compressor based evaporator plate systems,
especially the air cooled ones, like those sold by Adler
Barbour and others are inefficient, easy to damage and have major
components
that cannot be repaired and must be replaced. They are better suited
for smaller boxes and short term cruising where you can replenish your
refrigerated stores more often (note: we actually upgraded to a Danfoss-based
system in 2011 and loved it!). Because these less
expensive systems do not use a holding plate with an eutectic solution they
cannot take advantage of the significant energy savings made possible by freezing and thawing this solution.
They also are not set up with a receiver and valves for holding the
refrigerant in the system while working on/replacing components, many of
which are soldered into the system making removal difficult.
A new holding plate system installed
by a hired mechanic will easily cost $5K or more. Or you can do it yourself
for about $2K if you have the time, are willing to study/research and can learn some
basic refrigeration skills. This approach is not for everyone,
but if you take this project on expect to spend several months at it. Chances are real good you will need
some of this knowledge and the skills anyway if you cruise long term to remote locations
and with any refrigeration system. The down side is that you won't
have any of those refrigeration disaster stories to tell your friends.
The up side is you will always have ice for happy hour and you will have
extra money to spend on ice cream when you reach port.
Below is a list of most of the parts and equipment you will need to build your own bullet proof refrigeration system as I have. Rparts was a good internet source and the numbers are from an old copy of their online catalog (their website down as of April 2013). As they do not do phone business, some prior reading on your part will be necessary so you will know what you are looking for. Two great references are the Glacier Bay website and Nigel Calder's book on Refrigeration. Some of these parts are available from local refrigeration parts houses, like United Refrigeration, in major cities and also, of course, on the internet if you know what you are looking for.
Subsequent Note: Calder's Refrigeration book is a great reference, but it is becoming a little dated. The latest version of his Mechanical and Electrical Manual has more up-to-date information on the newer refrigeration systems, and should also be reviewed for a more complete picture of the current state of the art.
You can buy the compressor rebuilt from Joe at Polar Bear in Ft Lauderdale for about $150 or new from Rparts on the internet for about $500 last time I checked. This Tecumseh compressor has a cast iron block, is much more robust and will last much longer than any of the aluminum block models from York and others. I rebuilt my original and then bought a rebuilt unit and spare gaskets/parts just in case. The special ventilated compressor pulley is available from Blissfield, the company that now owns the rights to Tecumseh. The Leeson motor is available new on the internet from multiple sources for about $250. Buy the 3/4 HP model, not the 1/2 HP model which has no internal fan (see the Glacier Bay article on the 1/2 HP model on their website for a further explanation).
If you have
a large system with long tubing runs or don't use a generator while running
the system, you should
slow the compressor down so the electrical draw is equal to about 1/2 HP by
reducing the
pulley size on the motor to 2". The long tubing runs and many
twists and turns are the limiting factor in how much refrigerant you can
push around the system in an hour, not the compressor capacity. This
in turn limits the amount of BTUs that can be removed from the plates.
It is important to balance the maximum flow capacity of the system with the
compressor output so that the compressor is not working too hard
against itself. This also reduces the amp draw and
thus improves the battery terminal voltage while the system is running.
In addition we net our solar panel output against the
refrigeration motor electrical load thus reducing the load while running to
around 20 amps or less if we have good sun.
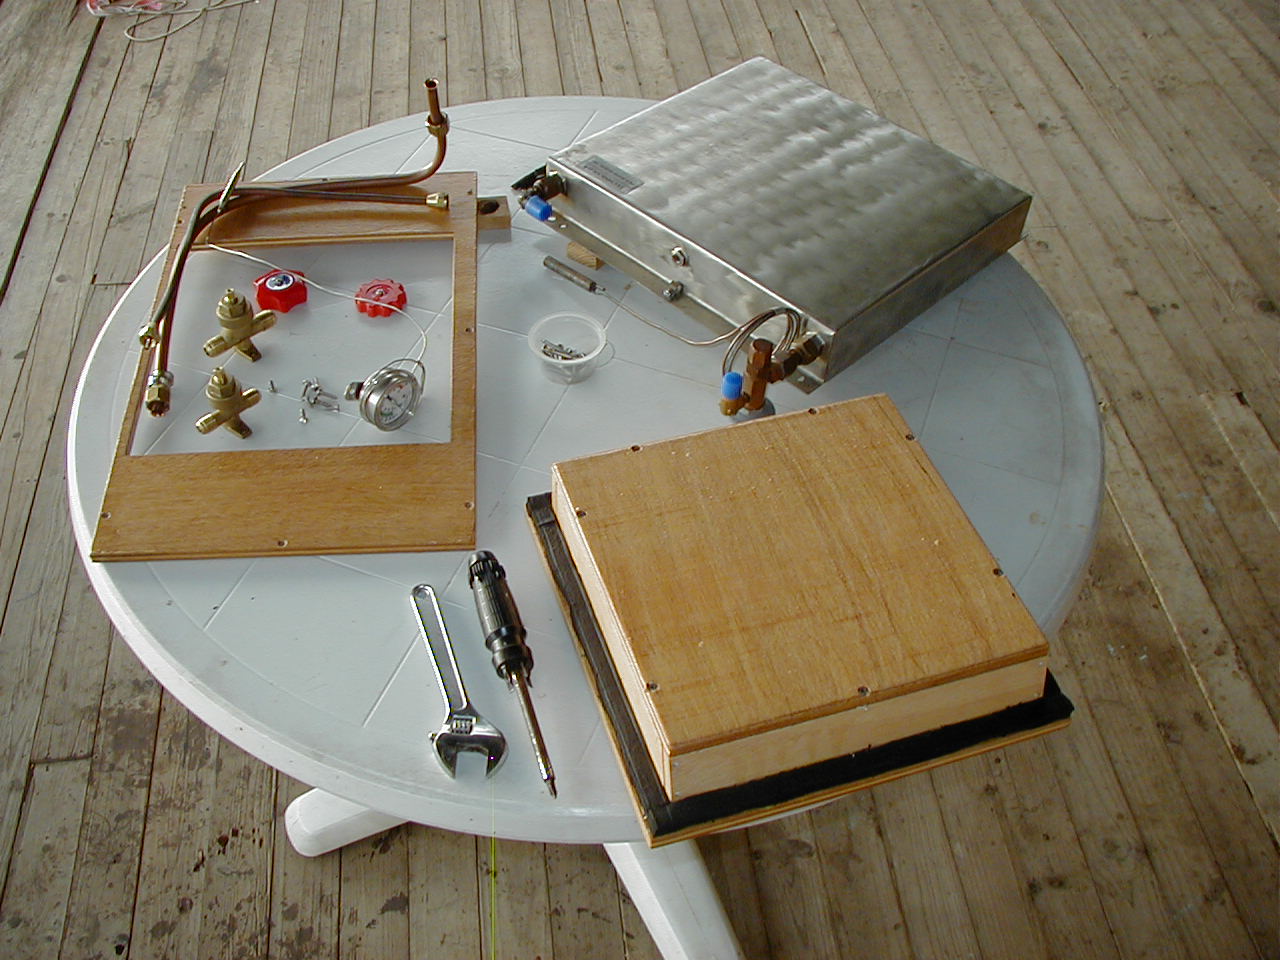
PARTS FOR 12 V REFRIGERATION SYSTEM:
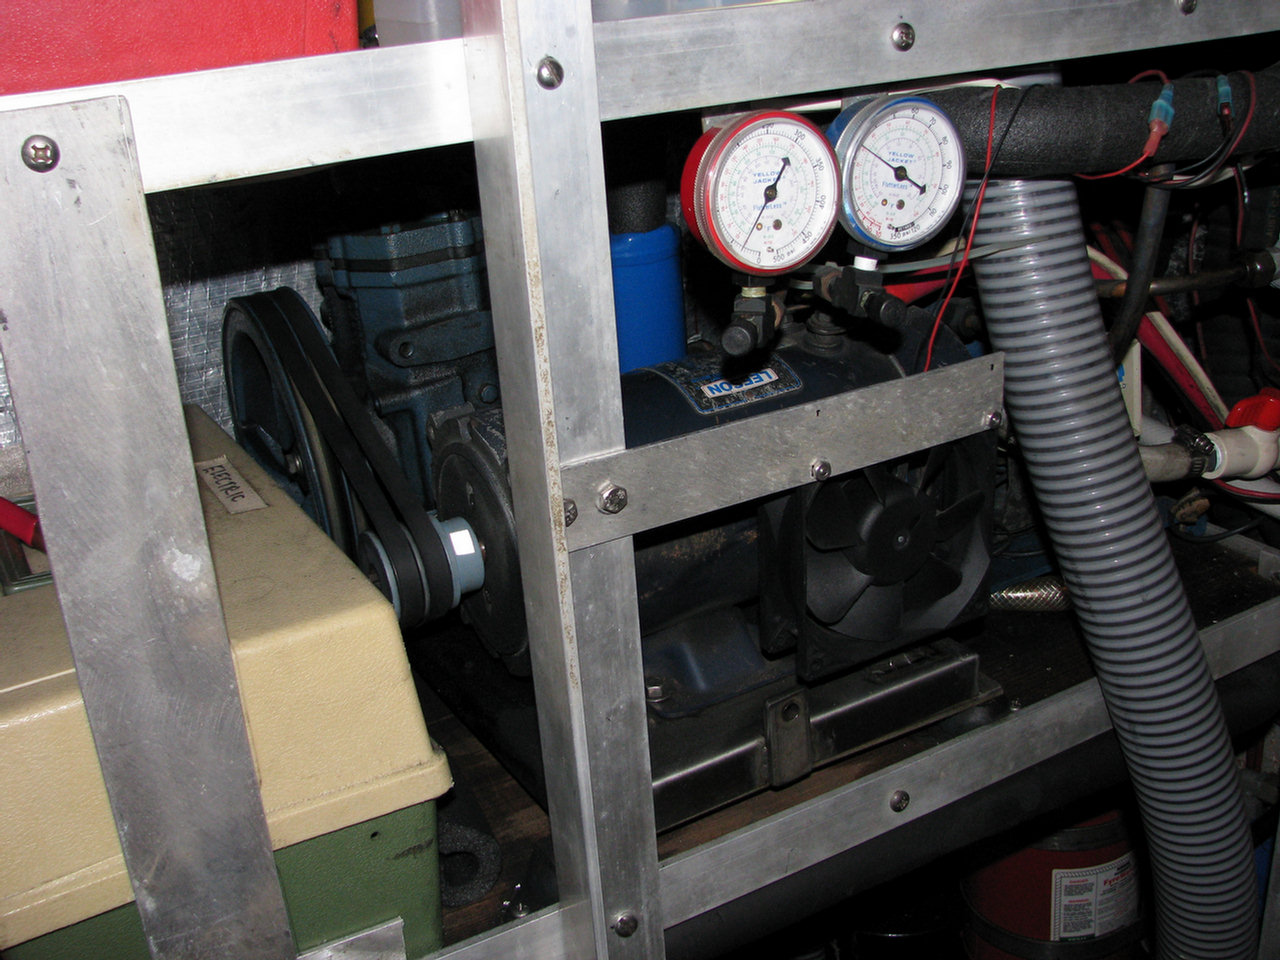
1 Tecumseh HG 1000 two cylinder compressor with double 8-1/2" pulley
1a Leeson 3/4 HP 12 volt motor with double 2" pulley
2 Suction accumulator Rparts 78-1001
3 Receiver 6 lb Rparts 75-0400
4 Condenser 1 ton Rparts 012-0523
5 Thermostats 2 ea Rparts 015-0288
6 Sight glass with moisture indicator, 3/8" flare Rparts 77-0200
7 Timer 60 minute Home Depot about $20
8 HP/LP cutout switch Rparts 015-1501
9 Drier 2.6"x6", 3/8" flare Rparts 020-0083
10 Freezer and Refrig holding plates Rparts custom made or used
11 Solenoid valve 12v
12 Raw water pump March 809BR Rparts 072-8092
13 Expansion valve- refrigerator, Alco, 1/2 ton, 3/8x1/2 flare, internally
equalized,
RC, FWZ
14 Expansion valve- freezer, all same
15 Compressor/motor base damper feet 4 ea Rparts 026-0102
16 Staybright silver solder Rparts 079-0800
17 Stayclean paste flux Rparts 079-0806
18 Flaring tool kit, 45 degree, not automotive
19 Tube benders 1/2, 3/8, 1/4"
20 Portable pressure gauge set for R12
21 Installed pressure gauges Hp and Lp
22 Electronic Leak detector
23 Vacuum pump
24 Leak Lock
25 Tubing cutter
26 Deburring tool Home Depot
27 Isolation valves for closing off freezer when not in use
28 Copper refrigeration tubing 1/2", 3/8"
29 Numerous flare and sweat on fittings
30 Electrical components to run the Leeson motor and raw water pump using
circuit breakers,
solenoid, HP and LP cutoff switches and a timer (electrical
diagram to follow when I have time).
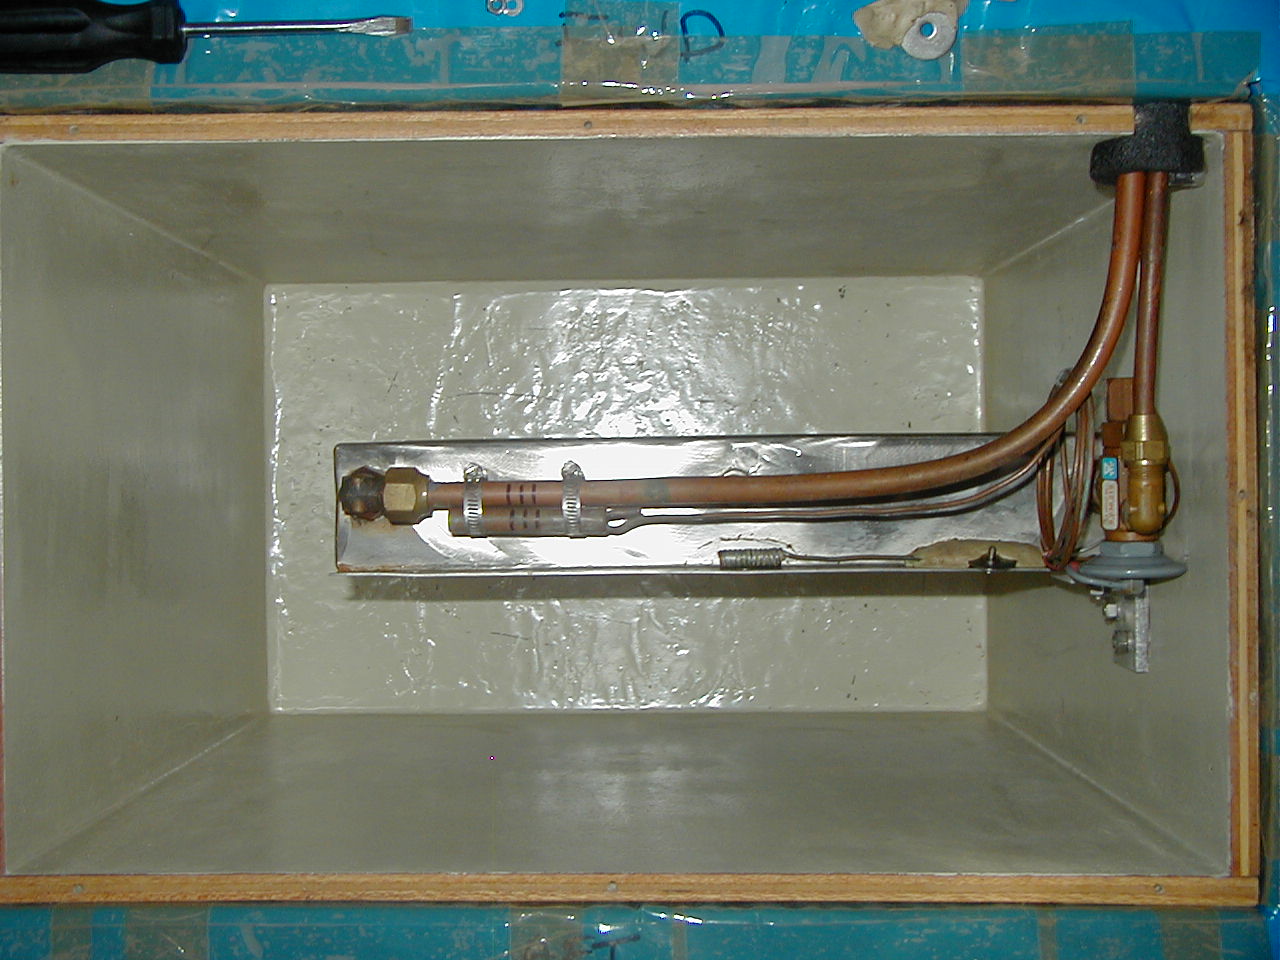
Originally my refrigeration system was an engine driven Crosby holding plate
system using the bullet proof Tecumseh HG 1000 compressor. The boxes started as an over/under front loading
refrigerator/freezer with 4" of insulation all around. The
interior liner of the unit was built in one piece with a separate front
panel to hold the doors and a slide in divider shelf. The divider
shelf only had 1" of insulation and that was so badly deteriorated that it
provided no insulation for the freezer.
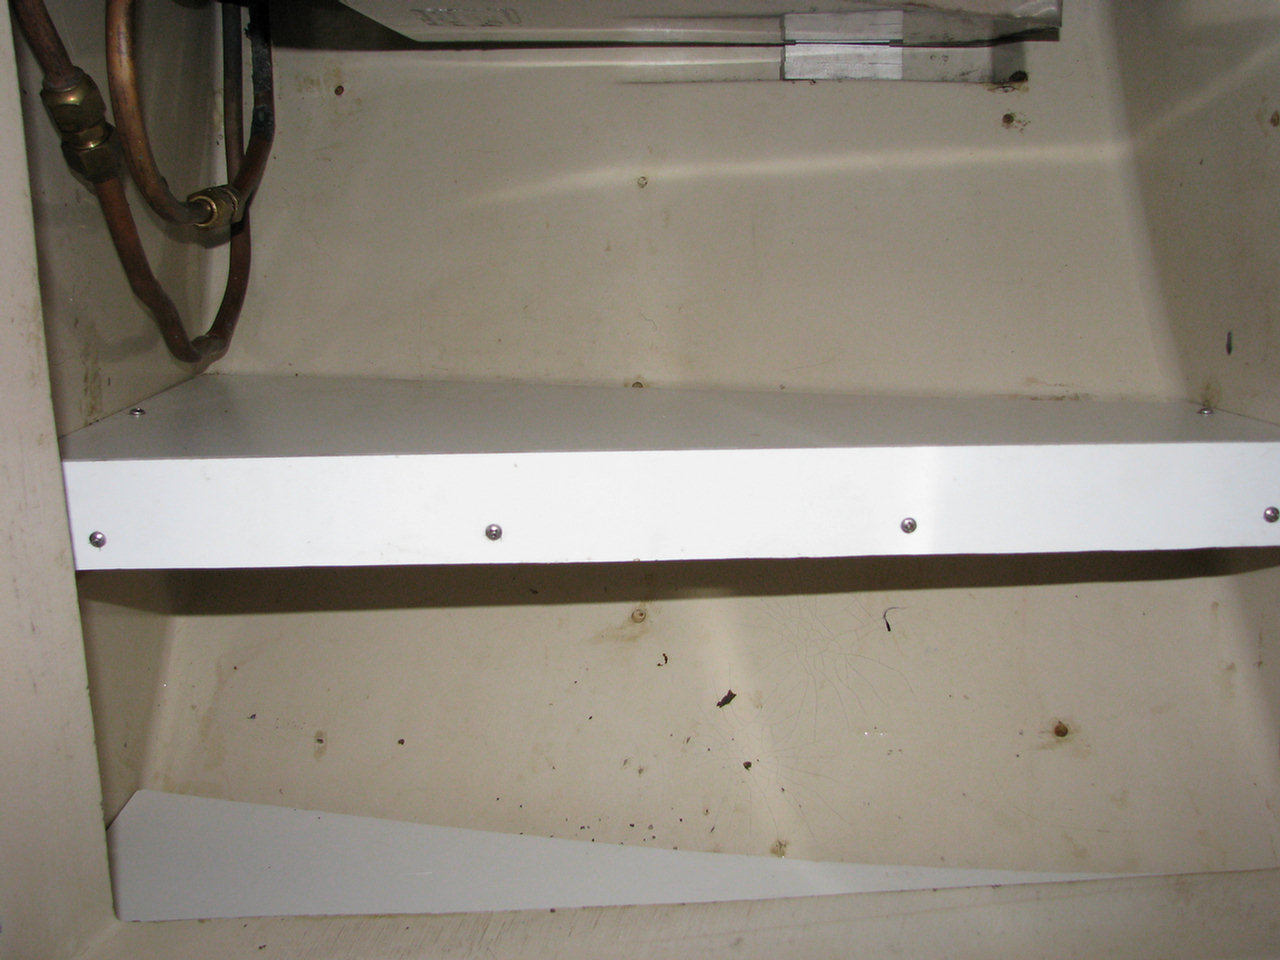
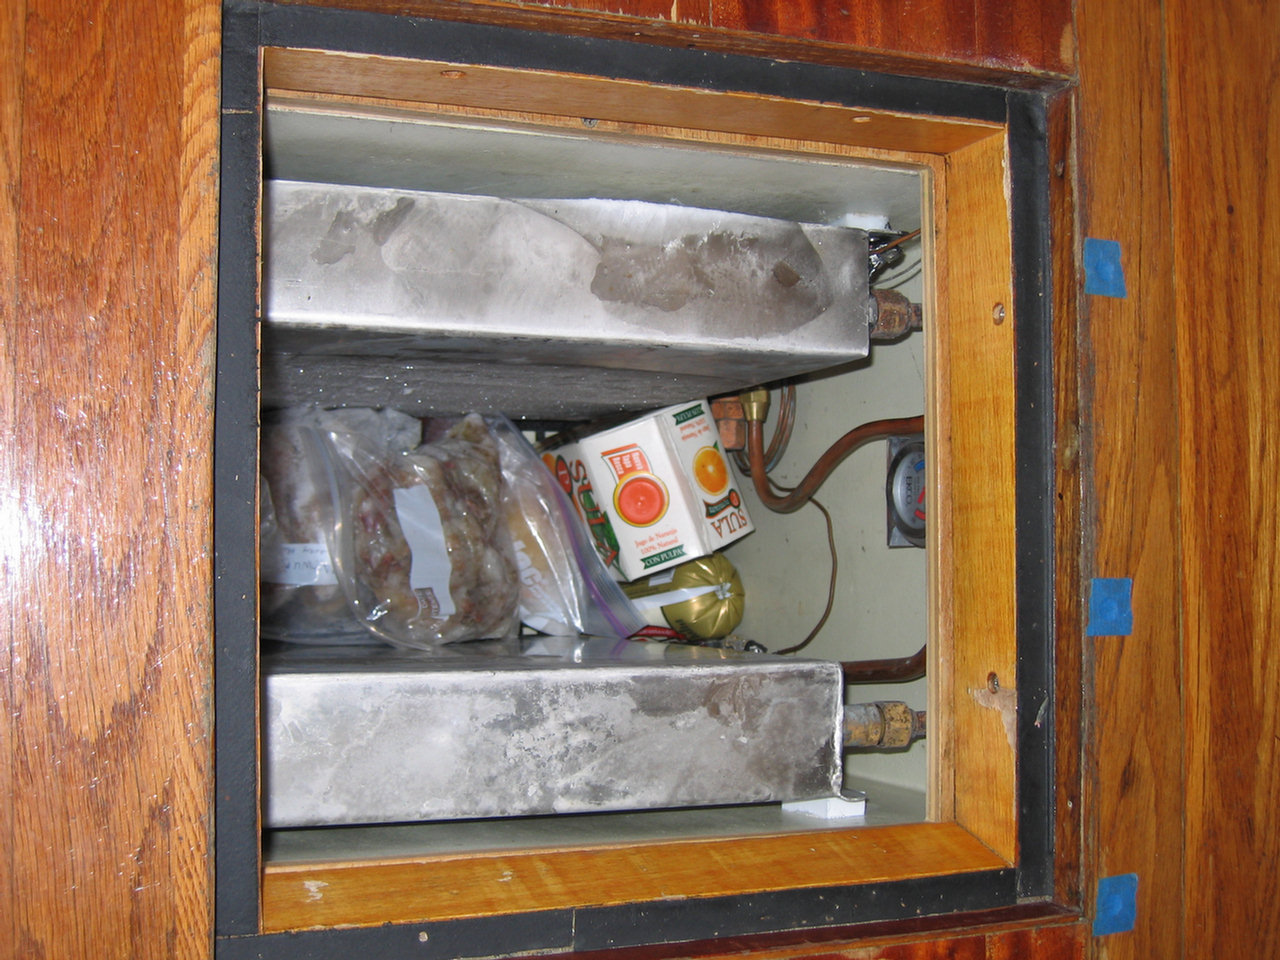
So the first step was create a new freezer space under the main cabin table, built to allow plenty of insulation. The original CSY Walkthrough double box is now all a front loading refrigerator with over/under compartments. The new freezer is separate and top loading built under the main cabin table. The refrigerator is now 10 cubic feet and the freezer 3. See here for how I upgraded the old nasty insulation in the refrigerator, without spending too much money or having to tear apart the whole thing.
Both the refrigerator and the freezer have heat loads of around 3000 BTUs a day--a little more if in the tropics with temps in the 90s, a little less if in temperate climates. The heat loads of any box are easy to calculate if you have the cubic feet of the box and the average thickness of dry insulation.
The BTU capacity of a holding plate can also be calculated if you know the size of the plate in inches and the type of eutectic solution.
Use the heat load and holding plate charts available on the Glacier Bay website or from other refrigeration companies like Sea Frost, Grunert and Technicold. Crosby's brine plates are about 10 percent less efficient than glycol plates used by most companies these days but their freeze-thaw temps are much tighter. This is more important in the refrigerator box than in the freezer. So a brine plate in the refrig and glycol plates in the freezer would be optimum. Used SS plates are often available on the internet or from owners installing new systems for less than $100 each-new plates are now well over $600 each. If a used plate looks intact and is not leaking eutectic solution it is probably fine. Mine are all used plates, some of which are original Crosby on the boat and most dating back to the late 1970s.
And you can mix up your own glycol eutectic solutions which would allow you to use a freezer plate in a refrigerator and vice versa by just changing out the solution. See Nigel Calder's refrigeration book or ask on the internet for the proper mix with water. I used a 1 part Propylene Glycol to 5 parts distilled water mix for a 27 degree refrigeration plate and it seems to freeze at the right temp. That was from Clive at Sea Frost who also told me that 1 part PG to 4 parts water gives a 0 degree plate. Calder says 40/60 PG to H2O gives 0 degrees and 30/70 gives 26 degrees. Richard Kohllman, a do it yourself guru on the internet, has another mix. As with many things in refrigeration there is often disagreement among the experts.
From Edwin on
s/v Frog's Leap,
December 2016: Regarding the temperature of the freeze point
for holding plates filled with propylene Glycol, here is the engineering
information.
http://www.engineeringtoolbox.com/propylene-glycol-d_363.html The tables
even show the ratios of glycol by weight and by volume, clearly not the same
given the density difference, and they also show the density of the mix so
someone can measure it with the densimeter or a float type densimeter.
We run the entire system for about 1.5 hours in the morning and the freezer only in the late afternoon for about 20 minutes. The daily current consumption is about 75 amp hours. The refrigerator is able to hold over for 24 hours, the freezer for 10. Because the freezer will only hold over for 10 hours we top it off in the late afternoon so it will hold over through the night. If I could get more/better insulation around the freezer it would do much better.
The current refrigeration system, as of 2007,
has the following modifications from what some of the pictures below show:
-Leeson motor mounted with 2" pulley so that the compressor
runs at about 415 RPM producing about .5 HP and drawing about 50 amps at
startup (average 40 amps per hour during pull down). Set up like this
the motor runs MUCH cooler and the system is better flow
balanced with the long refrigerant tubing runs I have.
-Freezer now has two 2100 BTU glycol holding plates producing more
even temps and holding over considerably longer. The insulation
consists of 2" of extruded polystyrene and 1" of NASA Heat Shield vacuum
sealed. Vacuum panels might be better but they are expensive, and the
warranties are suspect since it would be easy to puncture one during
installation and that is not covered. Bruce Antognoni at Nautic-Kold, in Ft
Lauderdale, who originally helped me rebuild my system, says that based on his side by side tests, the Glacier Bay vacuum
panels were no better than vacuum sealed NASA Heat Shield.
-Upper Refrig box has a single Crosby brine 3300 BTU holding plate while
the lower refrig box has a single 1500 BTU glycol plate. Since I had
the glycol plate, and couldn't find a suitable brine plate for the lower
refrig, I used what I had. This setup, though not optimum, gives
even refrig temps throughout the 10 cubic feet of refrigerated area, partly
because of the spillover from the upper to lower boxes, and makes the best use of
the 4" of insulation.
-Permanently mounted and easily visible service gauges
attached to the compressor.
-Permanently mounted muffin fan to help cool the Leeson
motor. It can now run for the full 1.5 hours and still not be very
hot to the touch.
-Suction accumulator added to prevent drawing liquid
refrigerant into the compressor by mistake and to allow excess
refrigerant to be held in the system without damage.
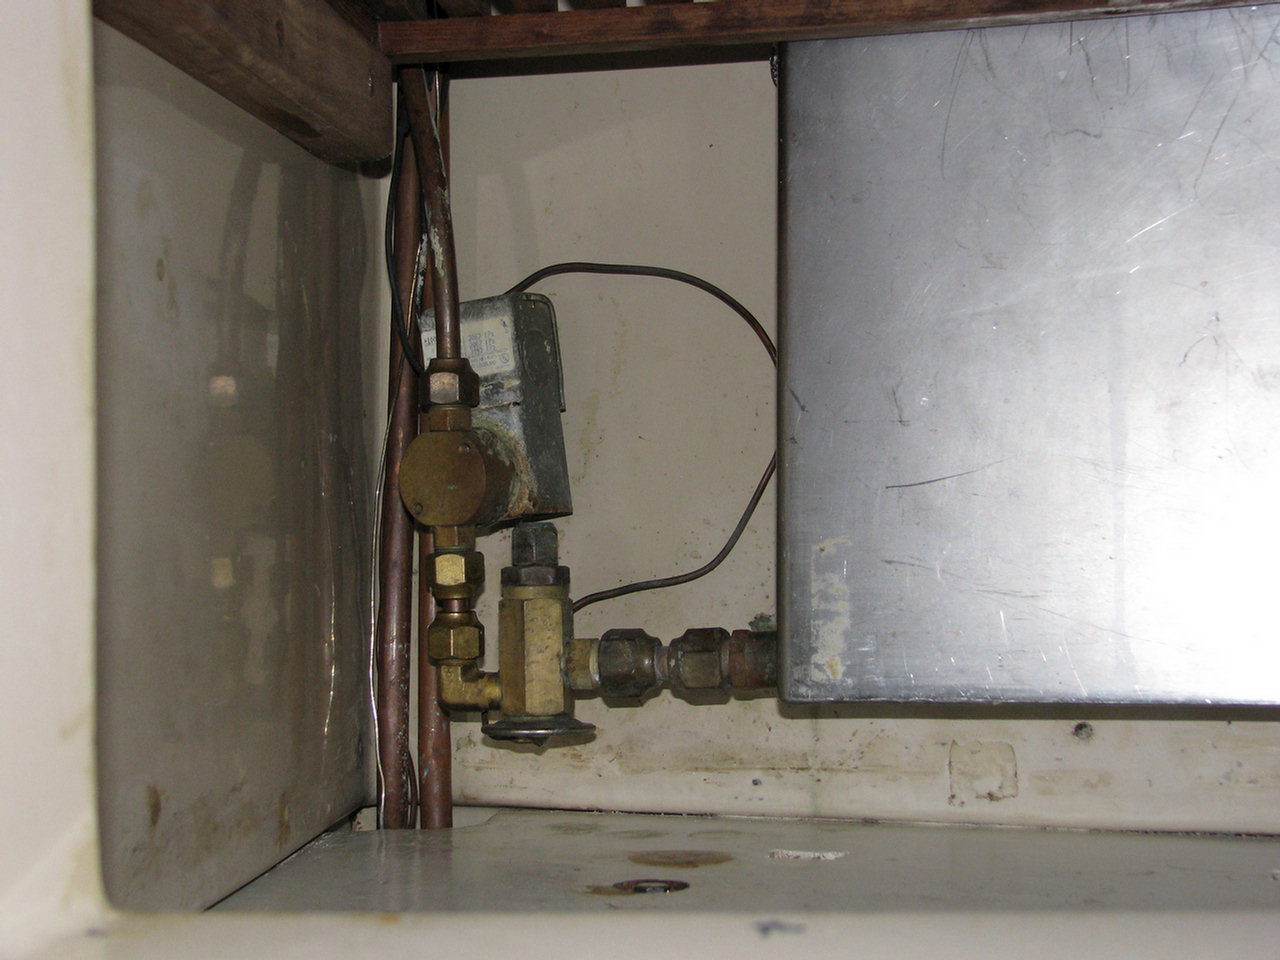
Note that we ripped out the old Crosby holding plate system and installed a Frigoboat system in early 2010. We are glad we did. The main difference is that the evaporator plate system is designed to keep the boxes at a pretty tightly-controlled temperature. The new electronic thermostat lets you precisely set the temp and monitor it easily. The compressors draw only about 3 amps each when running--much better on the battery than the 40 amp draw the Leeson motor drew. The total daily amp-hour usage is about the same, and with the holding plates removed, we gained a lot of box space.
|
|
|
|
|
|
|
|
|
|
|
|
|
|
|
|
|
|
|
|
|
|
|
|
|
|
|
|
Note: We upgraded to a Frigoboat Danfoss/Evaporator Plate
refrigeration system in January 2011, eliminating the holding plates and a
lot of noise and aggravation. We now believe this is the best
option for marine refrigeration. Installation notes for our Frigoboat |
|


Refrigeration System Options and Notes
When researching new refrigeration systems here are a few questions I would
have:
Talk to someone that has used one for a while and has good data based on
several years experience in a warm climate?
-Ask exactly what the system large enough to cool your box is going to cost?
-I understand from reading a bit on the forums that some units runs
continuously and do not cycle. So ask exactly what the system will
draw over 24 hours in your box.
-Being air not water cooled, costs up to 30 pct in efficiency (30% more
amphours a day) in a normal refrig/freezer application.
-Where/how is the system going to be mounted and what holes are necessary.
As an alternative have you checked out Frigiboat systems? They are water
cooled, Danfoss compressor based, evaporator plate systems and highly
recommended by such notables as Nigel Calder and Steve Dashew. The unique
thing about these systems is that the heat exchanger is outside the boat in
a bronze block. This eliminates the 1 ah draw of a cooling water pump. And
they have the latest speed reduction technology for the compressor when it
is not working hard.
If I were going to redo my system this is what I would go with (we
did, in 2010/2011), assuming I was not prone to lightning strikes and
had some extra boat units to spend.
(14 Nov 09 CSYO Post) Because I didn't have the time to completely
take my refrig box apart, I used canned closed cell refrigeration foam blown
into the void through 1/4" holes spaced throughout the box. This foam is not
the same as the canned foam you get at Home Depot, etc, which is not closed
cell, and will hold moisture. It is also different from two part foam which
was used originally on all the boxes. This worked quite well for me and
significantly reduced the heat load into the box.
There is a 4" space for insulation all around the original WT refrig/freezer
box and I believe the same for the WO. Bruce from Nautic-Kold in Ft
Lauderdale advised me what to do with this based on his having seen the
deteriorated insulation after taking several WT boxes apart.
For the new top loading freezer box, under the main cabin table, I used
extruded polyurethane sheet (Blue or Pink Board) and a product called NASA
Heat Shield, in a vacuum bag, making 4" thickness all around. According to
Bruce and Glacier Bay this is superior to the foam.
Either of these are relatively inexpensive but will involve considerable
work on your part to do it right. Tom Service, Ron Sheridan, Jim Dill and a
number of others have taken their top loading boxes apart and found greatly
deteriorated insulation. Without good insulation any refrig system will have
a real hard time keeping up with the significant added heat load. The best
insulation is probably vacuum panels but the price is very high and the
warranty lame if you get a hole in them.
Also, Glacier Bay has excellent info on their website and a table you can
use to calculate heat load vs box size and insulation thickness. It is worth
getting the box size right for your type of cruising and the insulation as
good as you can before you install your new system.
(16 Nov 09 CSYO Post) Water in the insulation and lack of
insulation foam seem to be pretty common findings as owners take their boxes
apart. Water in the insulation is worse than no insulation at all.
It took quite a bit of tinkering to get my two refrig doors aligned, and I
finally had to use a bit of good tape to fill a small gap.
The best door gasket material is the EPDM rubber strip material ribbed on
one side. It is about 3/4" wide and 1/4" thick. Big hardware stores sell it
as well as places like McMaster Carr and maybe RParts. It doesn't
deteriorate and seals very well. Marine refrig makers like Nautic-Kold use
it in their units. The original strips have been in my doors now for over 10
years and they still pass the dollar bill test.
The AHrs you use running your unit will depend on a number of things. They
include the heat load (BTUs) generated by the following:
-your box size
-thickness/quality of DRY insulation you have (up to about 4"-R20 for a
refrig box, 6"-R30 for a freezer box)
-leaks through door gaskets, drains, tubing/wiring holes
-the temp outside the box
-how often/long you open the door
-how often you put things in that need to be chilled down
The first three are all physical things you can do something about. The
larger the box, less insulation and more leaks you have the more your heat
load goes up and the more/harder your unit has to run. These are all
continuing significant issues that require more time than money, so
attending to them is time well spent. Look at it as a learning experience
that doesn't cost much.
(Topica Post 02/08/2005) Don't pitch your old holding plates! If it is original Crosby, it is a stainless steel brine plate with steel interior tubes. It has a capacity to remove about 3300 BTUs of heat an hour. Today it would cost you more than $600 to replace. They have a very tight freeze-thaw temperature span and work very well in our large boxes. My refrig plate, which is the same size as the one you mentioned, is cooling our 10 cu foot refrigerator box for about 25 AH a day. (top)
|
|
|
(11 Nov 09 CSY Owners Post) Based on what I learned over the years, there
are two types of holding plate solutions in common use. Neither is a true
eutectic solution, that does not change temperature at all as it changes
state from liquid to solid or the reverse. The solutions are brine (salty
water) and proplyene/ethylene glycol.
Most holding plates these days use the latter which has a rather wide
temperature change but is readily available, allows the use of copper tubing
in the plate and is about ten percent more efficient than brine solutions.
Brine solutions were used in all our original Crosby plates and one current
refrigeration company. These plates have a rather narrow temperature change
which is great for refrigerator use. However, they are more expensive to
build because of the use of steel for the tubing to prevent galvanic
corrosion. They are also a bit less efficient.
Glacier Bay claims that they have a special proprietary solution but not
much detail is known about it because it is a big secret. Look at their
website for what details they publish.
I used the original Crosby plate in my refrigerator and two glycol plates in
my freezer. A few years ago I needed freezer plates and changed a couple of
used plates from 26 degree F refrigerator plates to 0 degree F freezer
plates. I asked 4 different companies what the mix with water should be for
a 0 degree plate and got 4 widely different answers.
That's a problem with doing some of these things yourself, few experts will
give you a straight answer. I finally figured it out with Jim Dill's help
and now we are keeping it a secret. But who knows, maybe as a result of Ed's
pushing the envelope, we will want to start using helium in our plates in
the future.
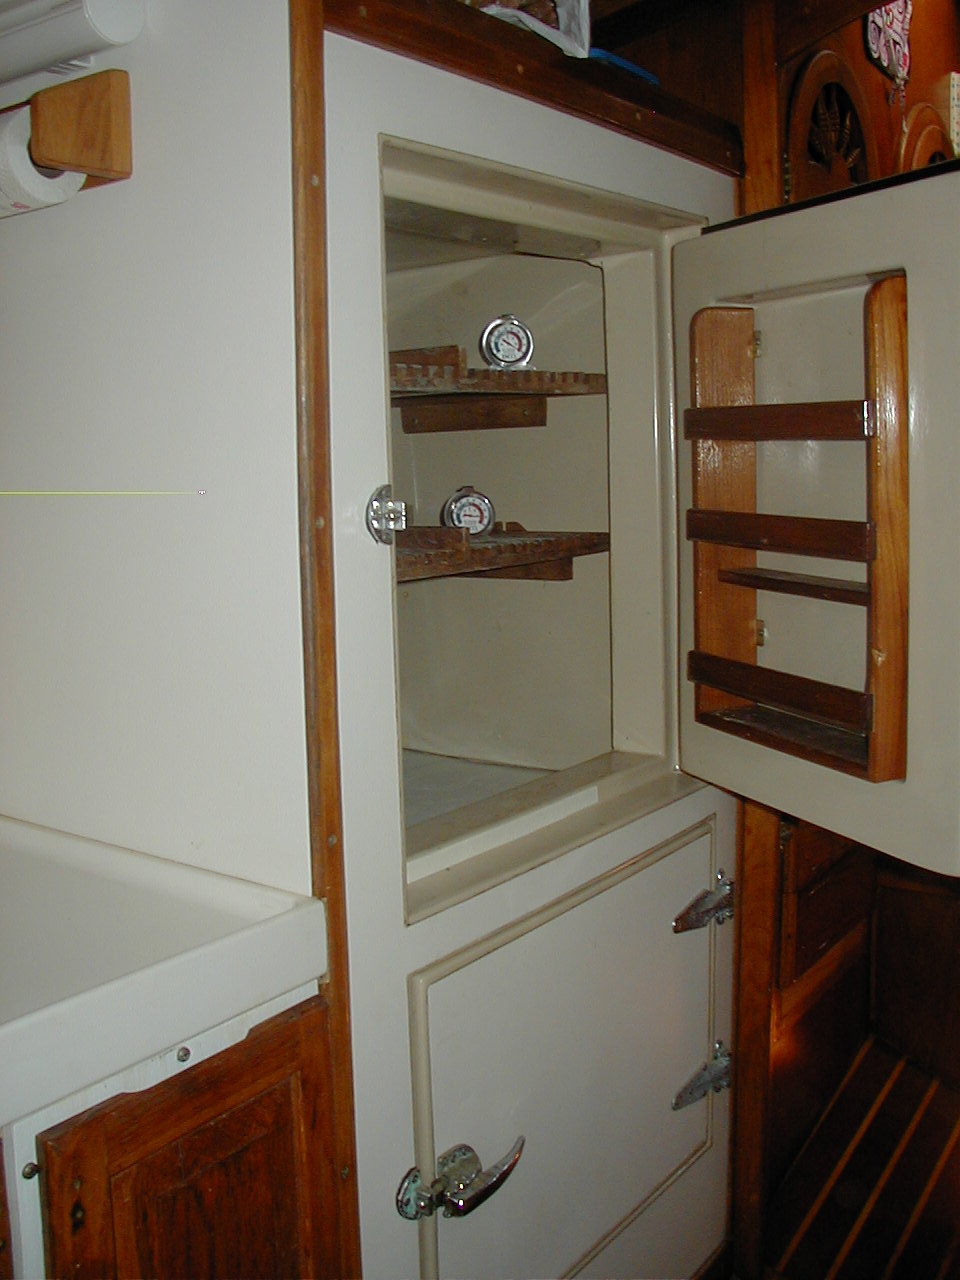
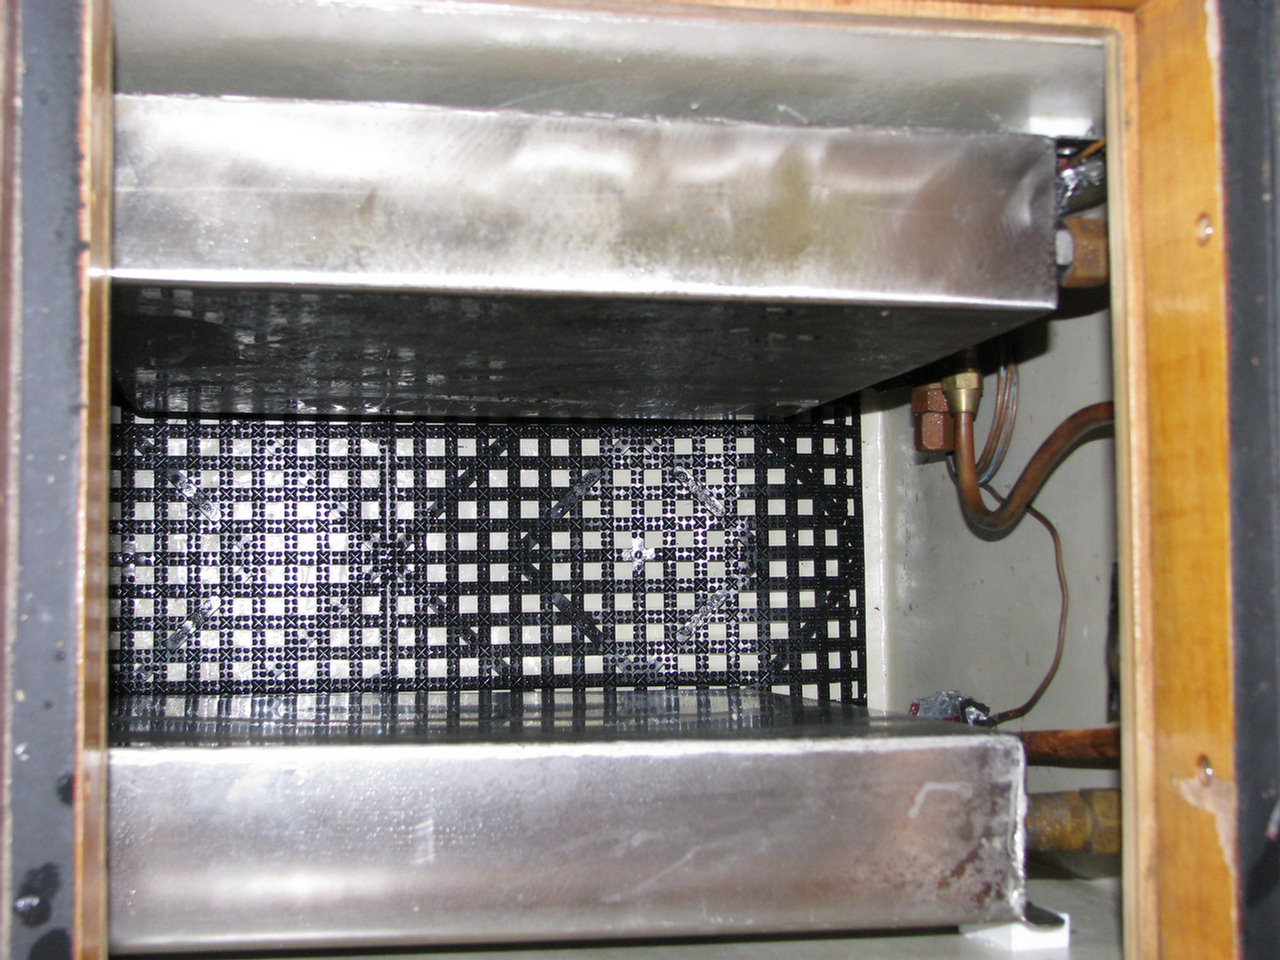
Upgrading the insulation in the original CSY 44 WT upright refrigerator/freezer
When I first tackled our the project of re-insulating our refrigerator, I consulted with a refrigeration expert who had already refurbished two CSY's refrigeration systems. He told me that the first CSY he did, he opened up the box liner to check on the insulation, and found it totally degraded to the point of providing virtually no insulation. So he tore out all the old original box, and totally rebuilt it with new insulation. That was a big expensive project. On the next project, he instead used was refrigeration-grade (ie not Home Depot) foam-in-place closed cell foam to re-foam the insulation, without tearing out the box. I followed his instructions and have been happy with the results (and the cost/effort).
The procedure is:
(a) Get good refrigeration-quality closed-cell foam in spray cans. First read the directions carefully on the spray foam can and understand its directions and cautions (ie be careful because the foam expands SUBSTANTIALLY as it cures--if you don't allow for expansion, it can cause damage to your box).
(b) Take the front face off the refrigerator/freezer space (see below for details)
(c) Allow the box space to dry for at least a couple of days
(d) Drill 1/4" holes in the walls of your box, on about 9" centers, into which you will spray the foam. Probing these holes with a screwdriver, I confirmed that there was virtually no original insulation left around my box. It had all disintegrated and crumbled to the bottom. Alternative or additional techniques are to knock for hollow spots and/or look for 'cold spots' on adjacent walls.
(e) Start at the BOTTOM holes, and spray in foam slowly, until it starts expanding out the next hole up. Move around and to all the bottom holes first, then move up to the next set of holes. Wait until the foam stops coming out of the next holes up, before moving on.
(f) Use the same technique on the doors, ceiling, and facings.
(g) Once it is all cured, drill out each hole 1/4" deep, and plug each hole with epoxy filler, so it is watertight.
Using this technique, we
used 15 (spray paint-sized) cans in our original CSY WT refrigeration box.
I originally did this in 1998, and as of 2011, the foam still looks like it
is doing the job.
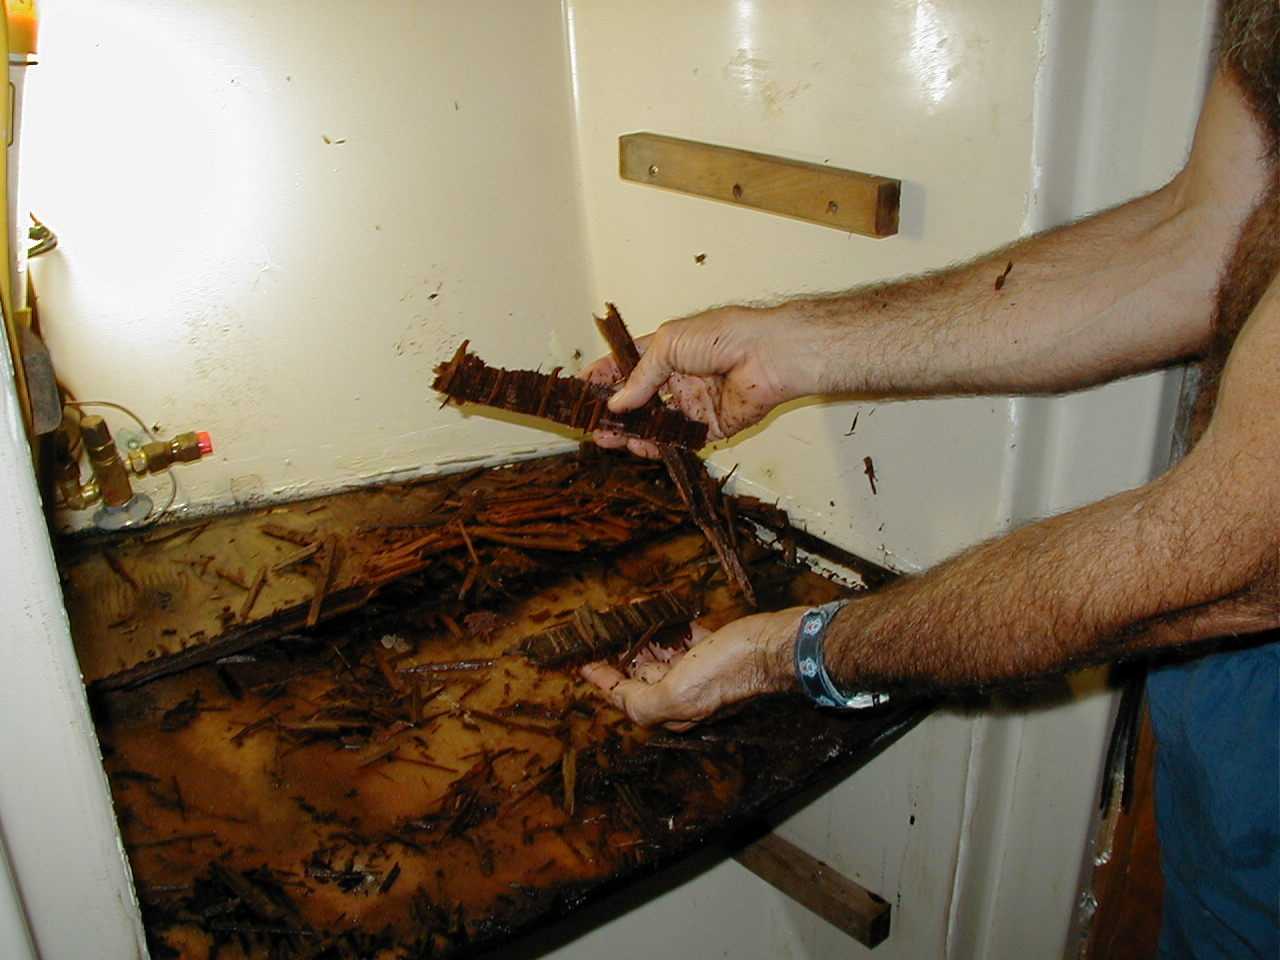
Removing the Front Facing of the CSY
Walkthrough Refer Box
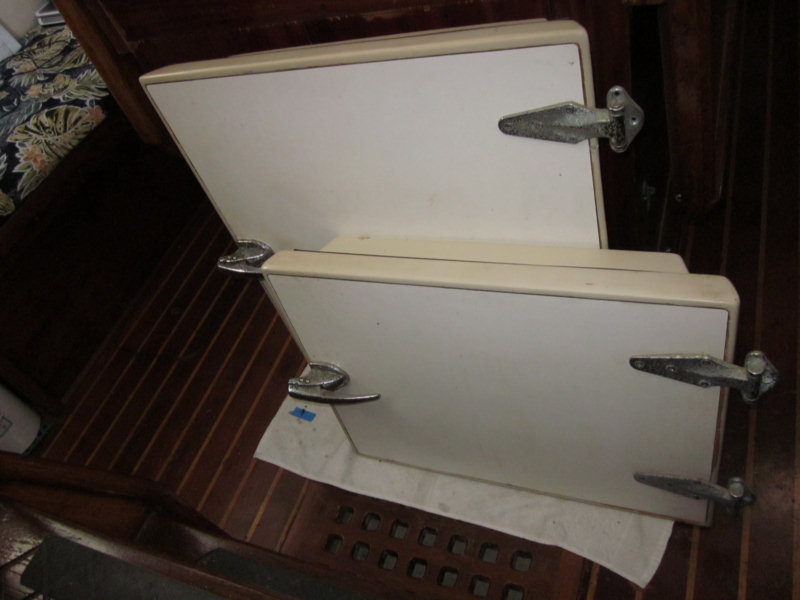
1. Remove the doors
2. Using a heat gun, heat the laminate around the front facing. This loosens the glue holding the laminate on. Gently remove the thin laminate. This exposes the screws that hold the front of the box on.
3. Undo the screws and remove the front facing.
It should come out in one large section (see photos below).
 |
 |
| Remove the Doors |
|
 |
 |
| Remove the Laminate |
|
 |
 |
| Remove the Front
Facing |
|
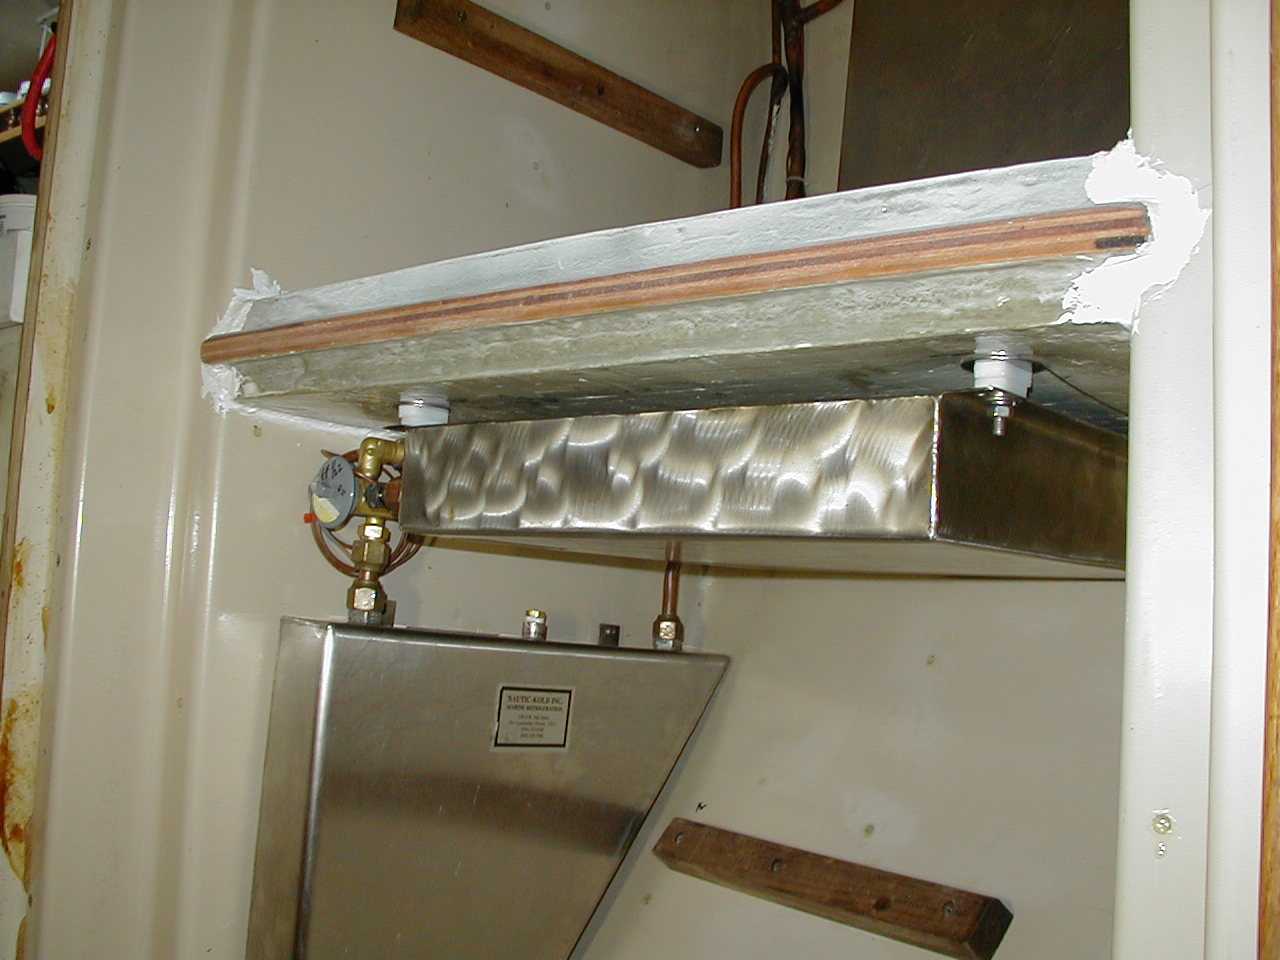
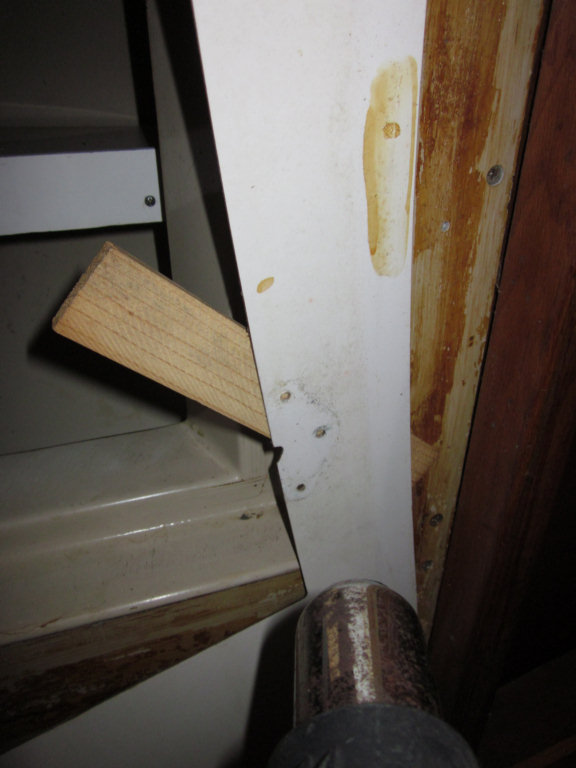
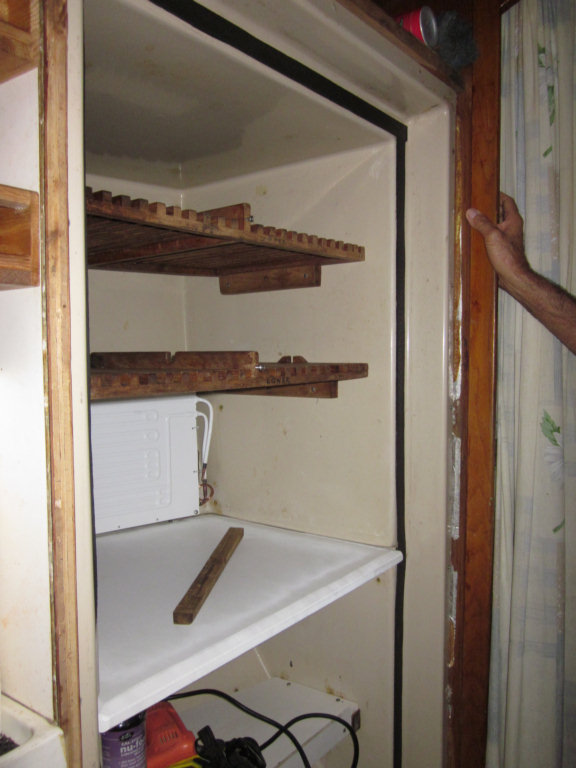
While you've got the front facing off, remove
and rebuild the shelf between the refrigerator and freezer box while you're
at it. (Old pictures below, new picture just above in the 'Front
Facing' picture. I used Expanded PVC which is a lightweight but
sturdy plastic that shouldn't develop rot problems in the moist environment,
like the old shelf did.
|
|
|
 One
tool we use all the time for checking interior temps on the refrigerator and
freezer is a
Raytek Mini Temp Non-Contact Digital Thermometer Gun. With this
little hand-held device, you 'shoot' any surface you want to take the
temperature of, and it immediately indicates the surface temp of whatever
you are aiming at. This is perfect for checking that your thermostat
settings on your fridge or freezer are set properly.
One
tool we use all the time for checking interior temps on the refrigerator and
freezer is a
Raytek Mini Temp Non-Contact Digital Thermometer Gun. With this
little hand-held device, you 'shoot' any surface you want to take the
temperature of, and it immediately indicates the surface temp of whatever
you are aiming at. This is perfect for checking that your thermostat
settings on your fridge or freezer are set properly.
It is also useful for checking the OUTSIDE of your box for cold leaks.