|
St Francis |
|

RIG & SAILS
Last Updated:
March 26, 2023
| Buying New Cruising Sails | Changing Profurl Bearings |
| Roller Furling Code Zero Sail |
Catamarans have a completely different rigging setup, and of course our rigging on the 2004 St. Francis is quite different than what was on our 1980 CSY. This section is currently under construction to reflect those changes. The old CSY rig page can still be found here.
Best Rigging Reference Book: Brian Toss's The Complete Rigger's Apprentice
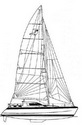
Our boat is a standard 2004 St Francis 44 Mk 2 catamaran built in South Africa. On our boat there is currently a mix of US and metric fittings.
Mast: The mast is a deck-mounted Sparcraft with double swept back spreaders and a Harken Battcar system. The mast extrusion is anodized aluminum with max dimensions 9.5 x 6.25 inches (").
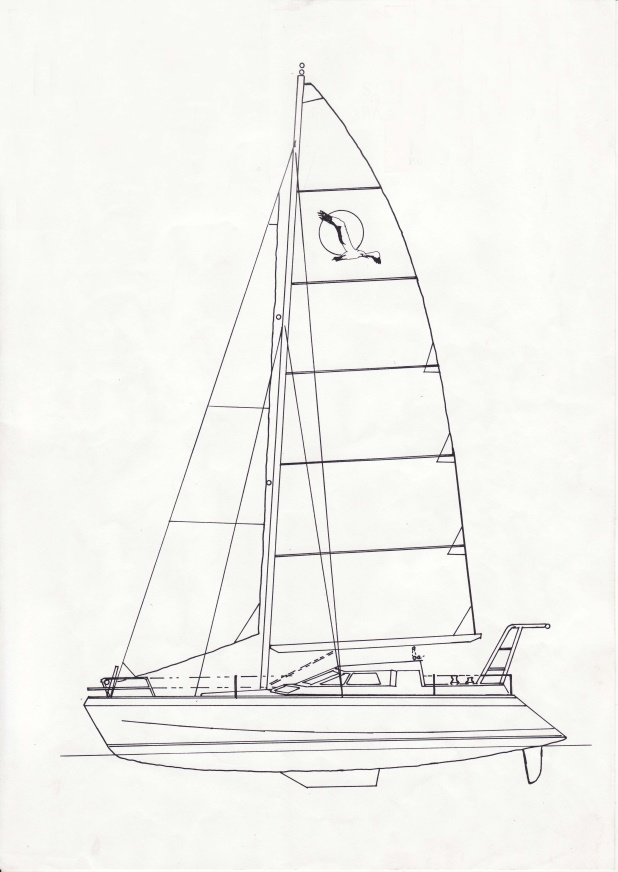
Spreader Tips: Lower spreader tips are 3.75" wide x 1.5" thick. Upper tips are 3.0"w x 1.25"t. Tips each have two wire grooves and one locking wire hole.
Rig Components: The standing rigging includes a headstay, inner forestay, two upper shrouds, two lower shrouds, two upper diamond shrouds and two lower diamond shrouds. There is no backstay or runners.
Measurements: For J/hook fittings, measurements are from inside surface of all J/hook fittings where they meet the bottom of the opening in the mast to center of pin at padeyes/chainplates on deck. For headstay and upper shrouds having padeyes on mast, from center of pin thru mast padeye to center of pin at padeyes/chainplates on deck.
Headstay with ~2000 Profurl NC42 furler: 51'-6.5" Wire is 3/8" 1x19. Upper end has mast padeye to toggle to Stay-LOK eye. Lower end has padeye to toggle to Stay-LOK eye. No turnbuckle.
Inner forestay: 34'-6.5". Wire is 8mm/5/16" 1x19. Upper end has swaged J hook to wire. Lower end has padeye to toggle to eye stud to turnbuckle to swaged stud to wire.
Upper shrouds (direct to deck, not over spreaders): Both 50'-8". Wire is 10 mm compacted 1x19. Upper end has mast padeye to toggle to swaged T to wire. Lower end has chainplate to toggle to eye stud to turnbuckle to swaged stud to wire.
Lower shrouds (direct to deck, not over spreaders): Port 35'-10.25", stbd 35'-11". Wire is 9/32" 1x19. Upper end has swaged J hook to wire. Lower end has chainplate to toggle to eye stud to turnbuckle to swaged stud to wire. Note: Our 2019 rigging purchase upsized these from 9/32" to 5/16"
Upper diamond (over upper spreaders): Port and stbd same 28'-11.75". Wire is 8mm/5/16" 1x19. Upper end has swaged J hook to wire. Lower end has J hook stud to turnbuckle to swaged stud to wire.
Lower diamond (over lower spreaders): Port and stbd same 31'-9". Wire is 10mm 1x19. Upper end has swaged J hook to wire. Lower end has J hook stud to turnbuckle to swaged stud to wire.
For 3/8" and 10mm wire all pins are 5/8". For 9/32" and 5/16" wire all pins are ½".
We ordered all of our rigging wire from Sailing Services in Ft Lauderdale. They swaged the J hook (aka "lollipop") fittings and added an extra foot to the length we needed so we can put our own Stay-LOK fittings on the bottom end. You can re-use Stay-LOKs by just replacing the "cone".
Wire tensions should be all set to 20% of breaking strength of that wire.
We brought the headstay with us back from the USA to the Philippines in late 2018, so we could replace this critical piece of rigging before our planned long trip in 2019. In late 2019, we shipped the rest of the rigging, and completed the re-rigging project in 2020.
Boom Mainsail Control Lines
We have 6 sheaves in the end of the boom to handle the outhaul and 3 reefing lines with two spares. Our outhaul comes out the forward side of the boom to a cleat. The three reefing lines run inside the boom and then out under the forward end of the boom through line stoppers to a self tailing winch on the back of the mast.
Reefing lines for the clew reefing cringles (large gromments in the leech of the sail) should start with a slip bolon tied around the boom directly under each cringle. From there each reefing line should go up through its respective cringle and then down and aft to one of the sheaves in the end of the boom. Each reefing line will then run forward inside the boom, exit at one of the exit plates on the side of the boom and then through the cam cleat to hold it in place. A cleat forward of each cam cleat would be much more secure than just a cam cleat.
The other grommets in the sail forward of each clew reefing cringle are called reef points and are used to tie off the foot of the sail around itself using a square/reef knot (no grannies). This keeps the reefed foot of the sail from flopping in the breeze and chafing your bimini/dodger.
The outhaul should go from the fully hoisted clew cringle around the center sheave and then forward inside the boom as do the clew reefing lines. Using the center sheave helps keep the boom upright and from laying over on its side.
For security most sailors tie a separate short line through the active reefing cringle and around the boom so that if the reefing line breaks you won't end up tearing the sail at the reef points.
Either way of securing the bitter end of the reefing line will work. However, I believe that tying it around the boom is more secure as then there is no danger of the padeye pulling out or breaking or the line breaking at the sharp turn of the padeye.
The "reef points" are best secured around the foot of the sail if it is loose footed in order to control the bulk of the reef sail. If yours is not loose footed then I guess you will have to tie them around the boom also.
If the reefing line breaks all the load of the reefed sail will go on the reef points and the sail will rip, so we (and most racers/cruisers) tie another line around the reefed clew cringle and the boom just to make sure it is secure.
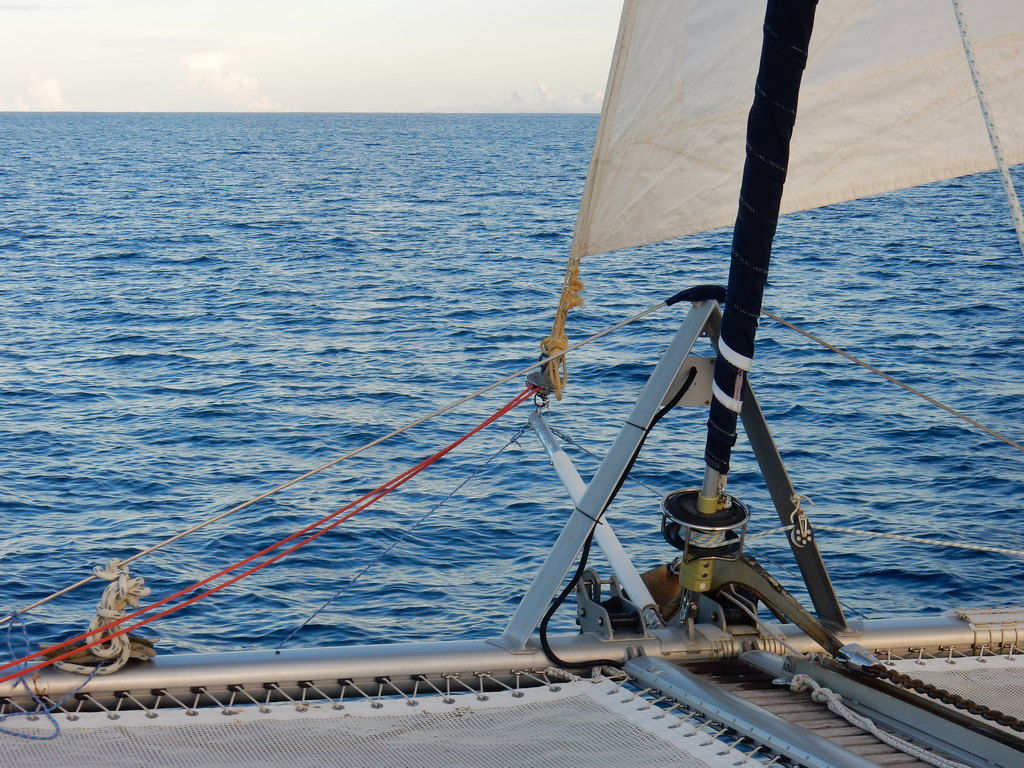
Roller Furling Code Zero Light Air Sail
See the original post about purchasing this sail for our CSY. Code Zero for CSY
When we bought the catamaran, the Code Zero was one of the items we kept and adapted to the cat. We had a sailmaker friend show us how to cut down the sail to fit the St. Francis rig, and Sherry did the sewing.

It uses a Facnor endless furler and rolls up on a stiff rope on the leading edge.

We now use a "prodder" on the bow (a removable bow sprit) for the Code Zero. We don't have good stainless welding capabilities where we are, so we fashioned a temporary one out of aluminum. Some day we'll replace it with a proper heavy duty prodder.
Buying New Cruising Sails
Our St. Francis 44 came with a set of nearly-new sails, so we have not yet had to buy sails. However, I bought a full set of new sails for our CSY. My notes on the process are here: Buying New Cruising Sails
(top)
Below is information on how to change out a Profurl Roller Furler frozen bearing.
I've had my two Profurl NC42s now for about 10 years with no problems. I have, however, heard of one or two bearing problems in the past. If you figure out how to take yours apart look closely for any sign of water intrusion into the bearings and where it might have come from.
I believe the Profurl manual says to wash them off with fresh water after use. So if you haven't been doing that and salt water got inside that may be the problem. It could also be a problem with the extrusions and their connecting pieces that ride around the headstay. Or a bent extrusion. You might want to look around carefully for other things that might be causing the problem before you launch into the bearings.
I removed the system and found that the bearings in the main swivel unit had started rusting up. The double lipped seals had let moisture in. Taking them apart is pretty much the same as any mechanical seal, I first drilled a small hole into the seal in order to get a scratch awl into the seal without damaging the bearing surfaces in order to pry out the seal (you are going to destroy the seal any way you do it). I have pictures and a diagram of how they are assembled in case anyone needs it. Once the seal is removed, there are three snap-rings in the interior of the swivel, both internal and external types. The first one is mainly a stop for the seal, then on some there is an aluminum spacer that needs to come out before you can remove the next snap-ring that holds the bearings. After removal of the second one you can press the center section of the swivel out of the carrier which will push out the other seal.
I found info on the bearing sizes from Profurl and went to Miller Bearings in Tampa and they ordered the correct sizes for me. The old bearings are carbon steel, open faced, as an extra precaution I ordered sealed bearing as well as outer seals as before. Assembly is a little different than removal, you must install the first seal onto the center section and put on the first snap-ring before pressing it into the carrier, unless you have some very long snap-ring pliers.
The system is back up and working smoothly at a cost of less than $120. I also found that this is a more common problem than we thought. Most riggers do not even bother replacing the bearings, they just order new assemblies. I don't want to think about how much that would have cost.
Profurl of course advertises their systems as having lifetime seals, but they don't warrant them that long. There are some of their furling units that they no longer make parts for, my particular one is in that category as it is a mainsail furler unit. replacing the whole assembly was not an option.
There is a difference between the larger and smaller furler units. The smaller one has a spacer installed for some reason, and if you don't remove it you cannot get the snap-ring out.
Copyright 2022
WebDesignsInternational